
Unboxed: mixed reality escape room
Visual Design, Exhibition Design, Set Design, Narrative Design
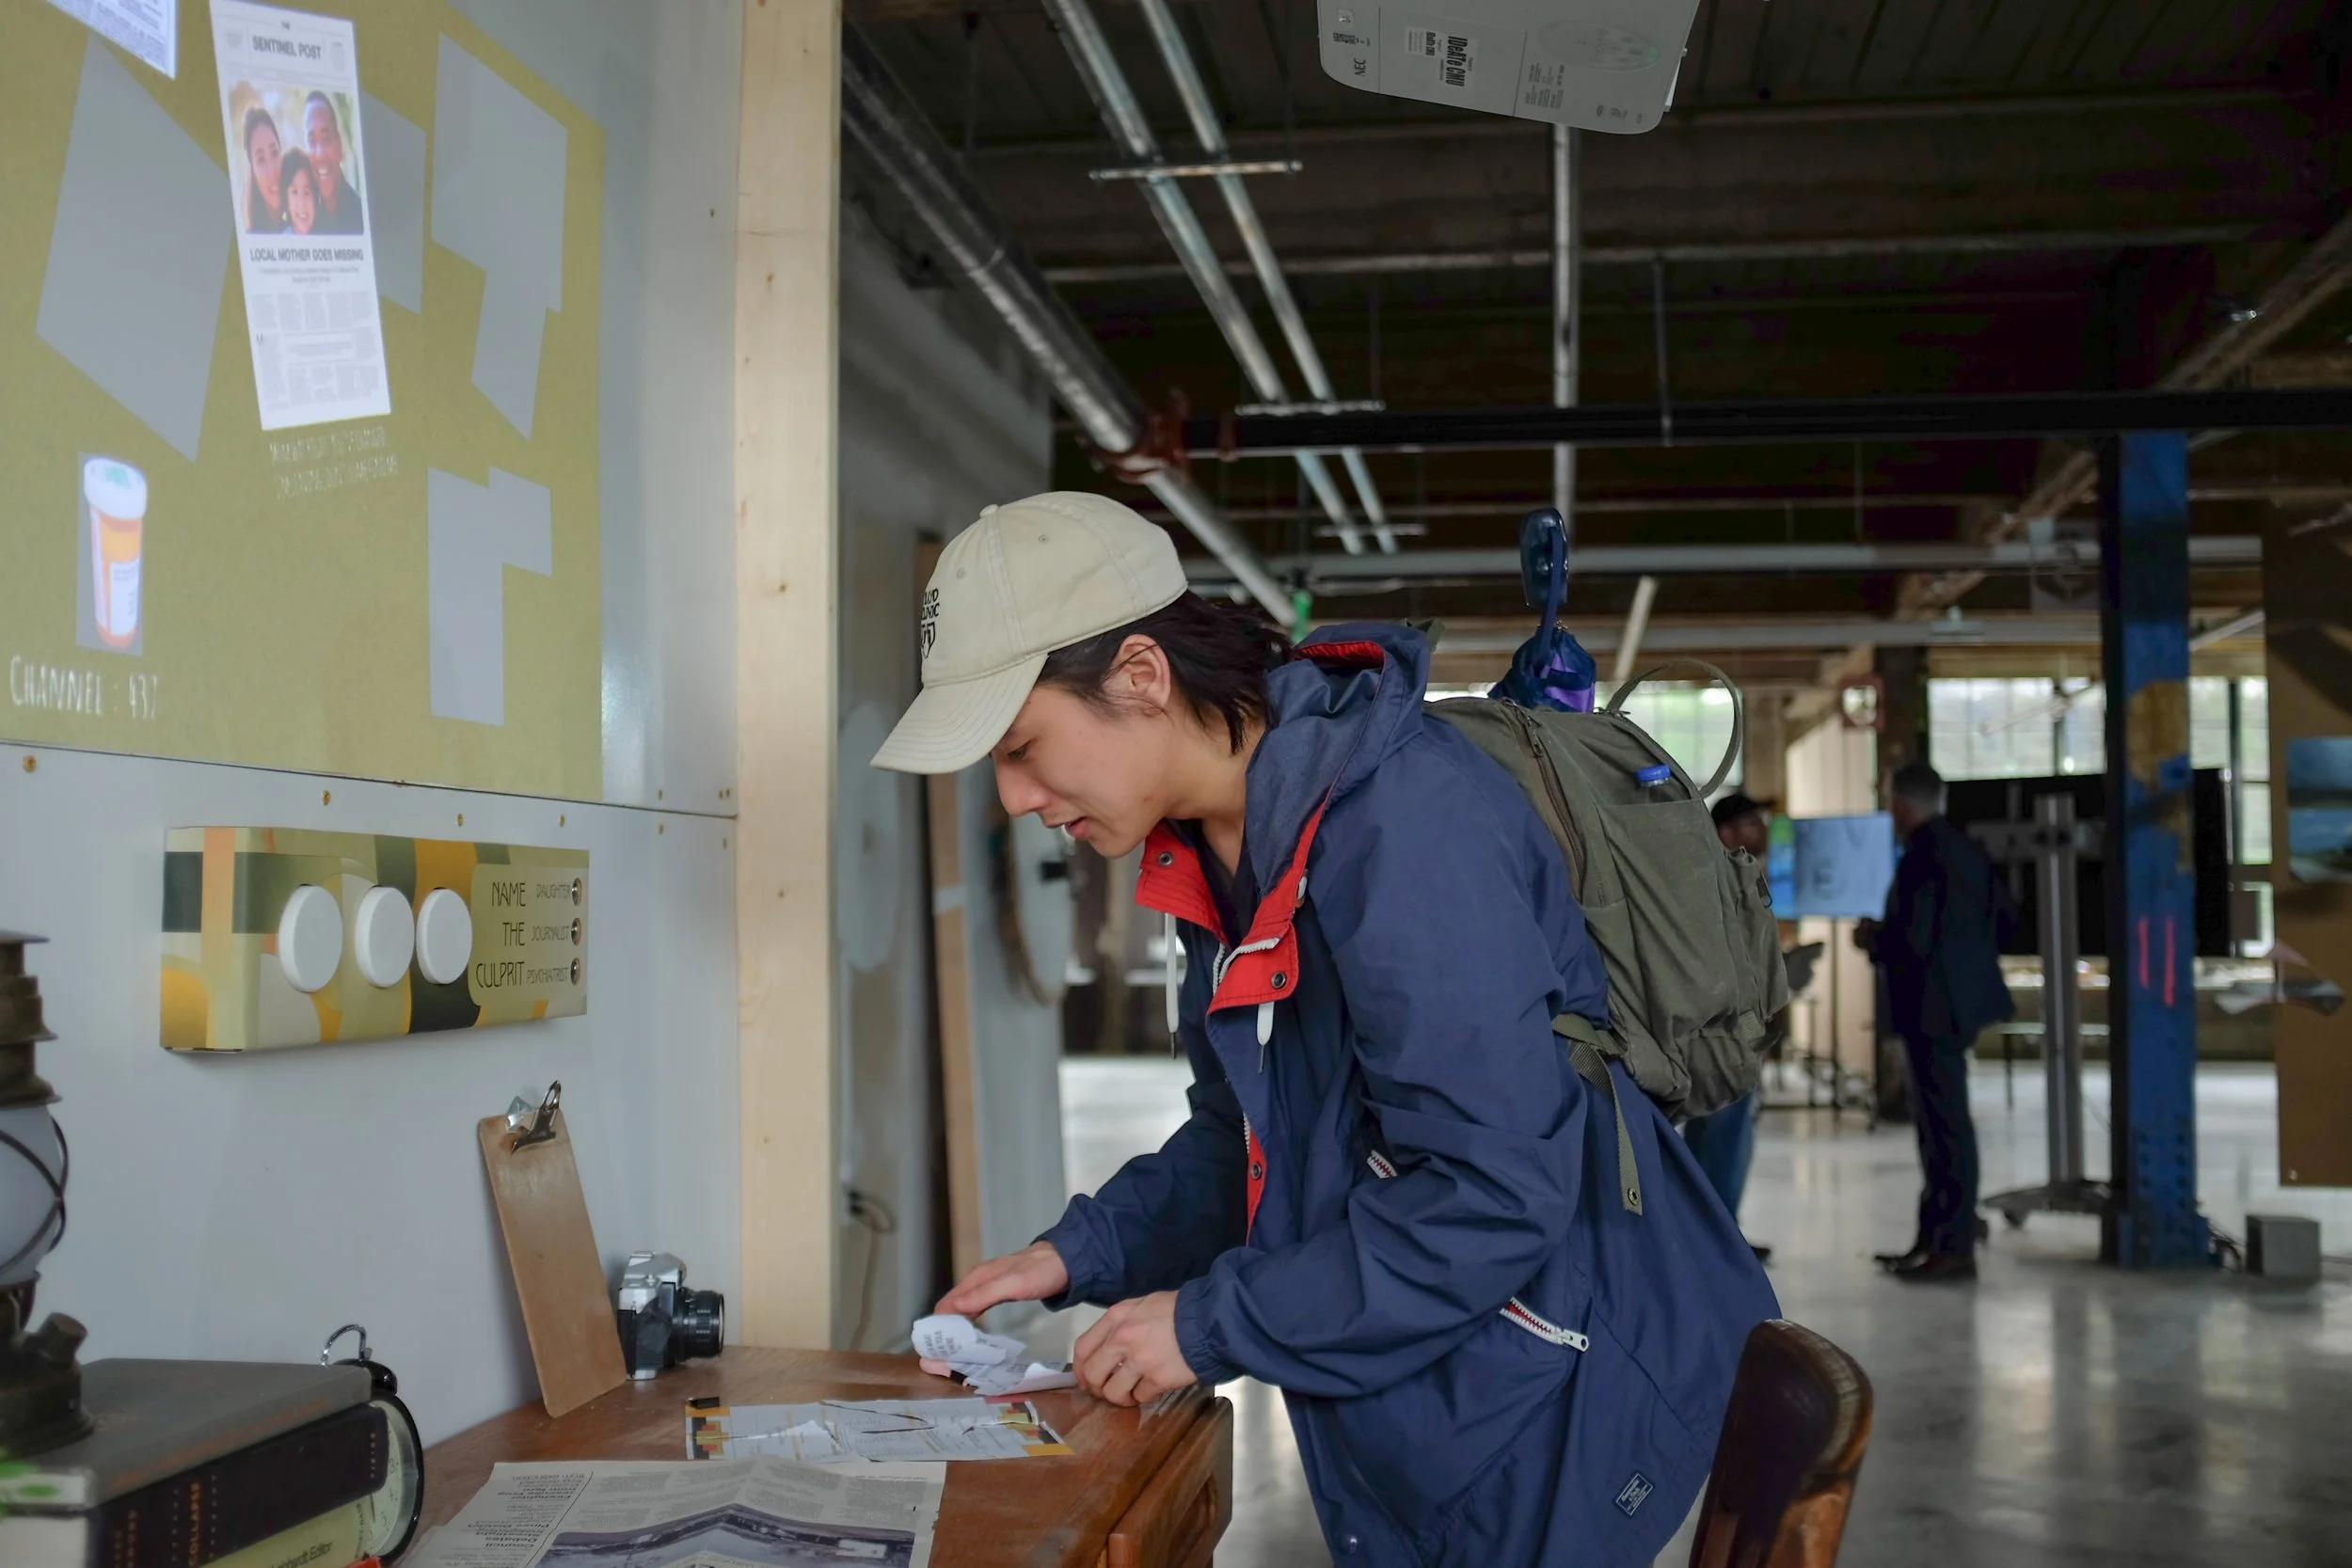
Unboxed is a mixed reality escape room that uses creative technology to create novel interactions. Uncover the truth behind a mysterious death by solving clues that blur the line between the physical and digital realms.
Role
Experience Designer, Set Designer, Visual Design, Narrative Design
Timeline
Jan - April
Tools
Figma, Adobe Suite, After Effects, TouchDesigner
With
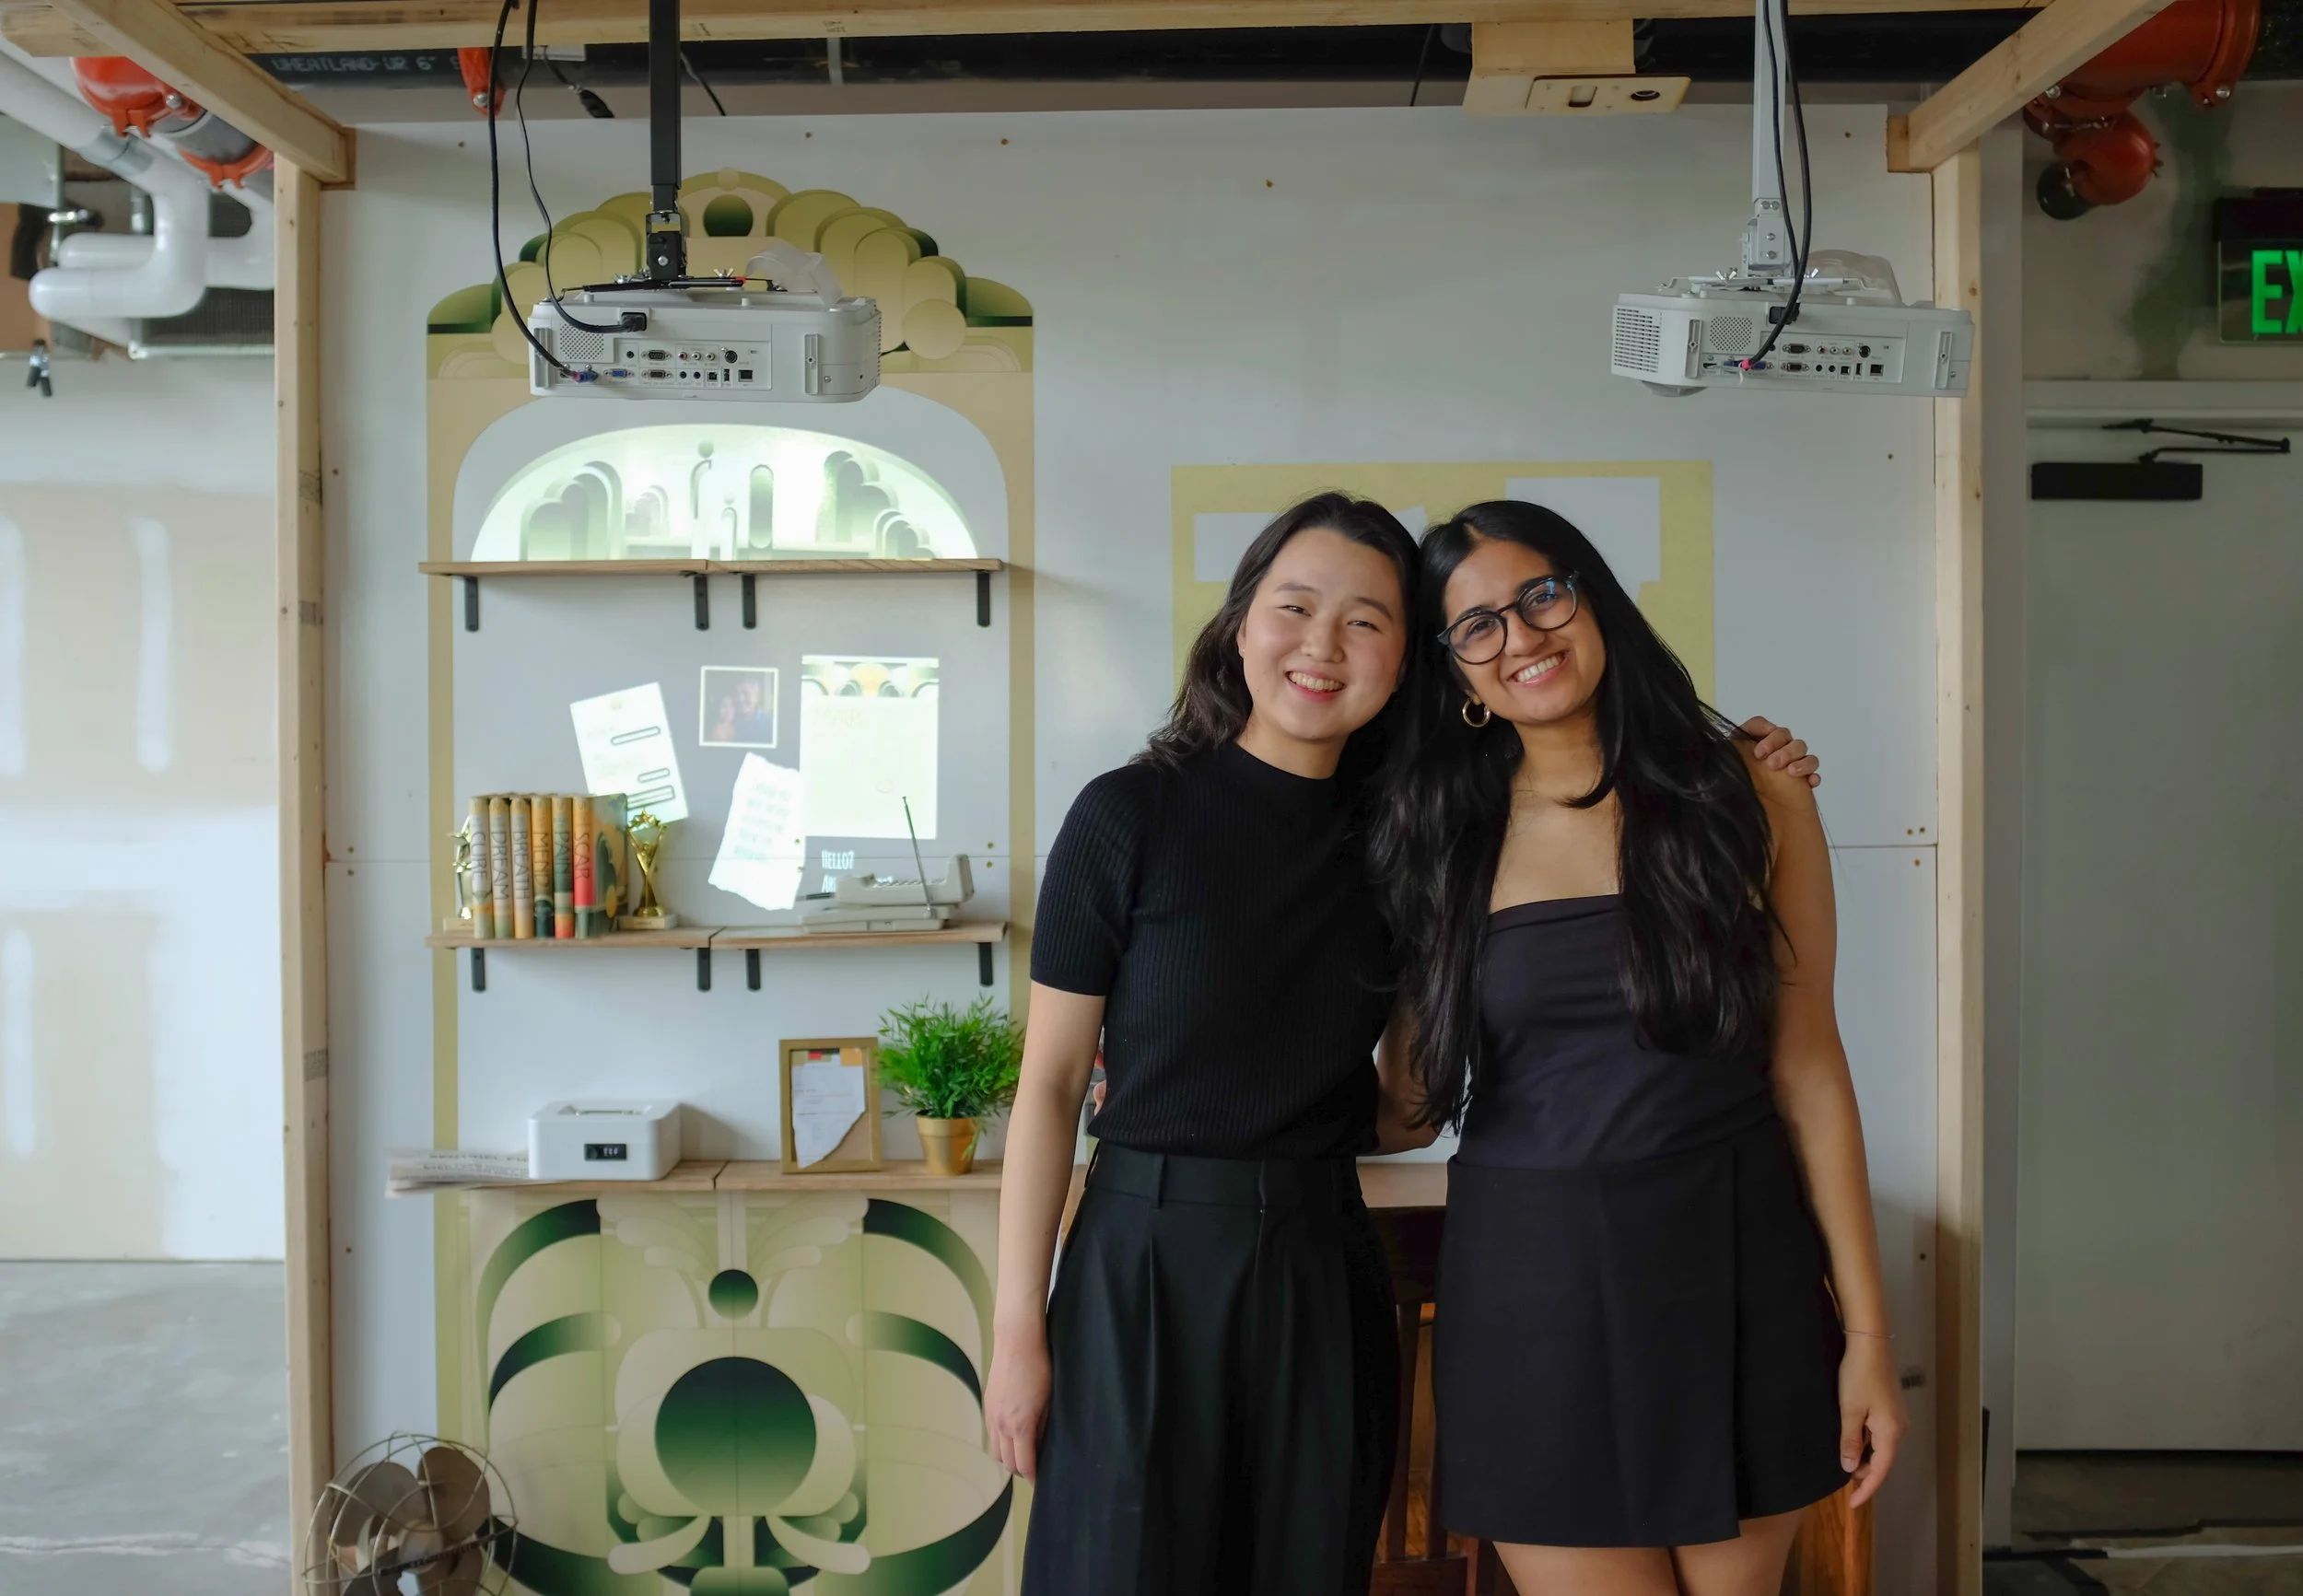
Juhi Kedia – Creative Technology

150+
total visitors
9
rounds played
5
Culprits Caught

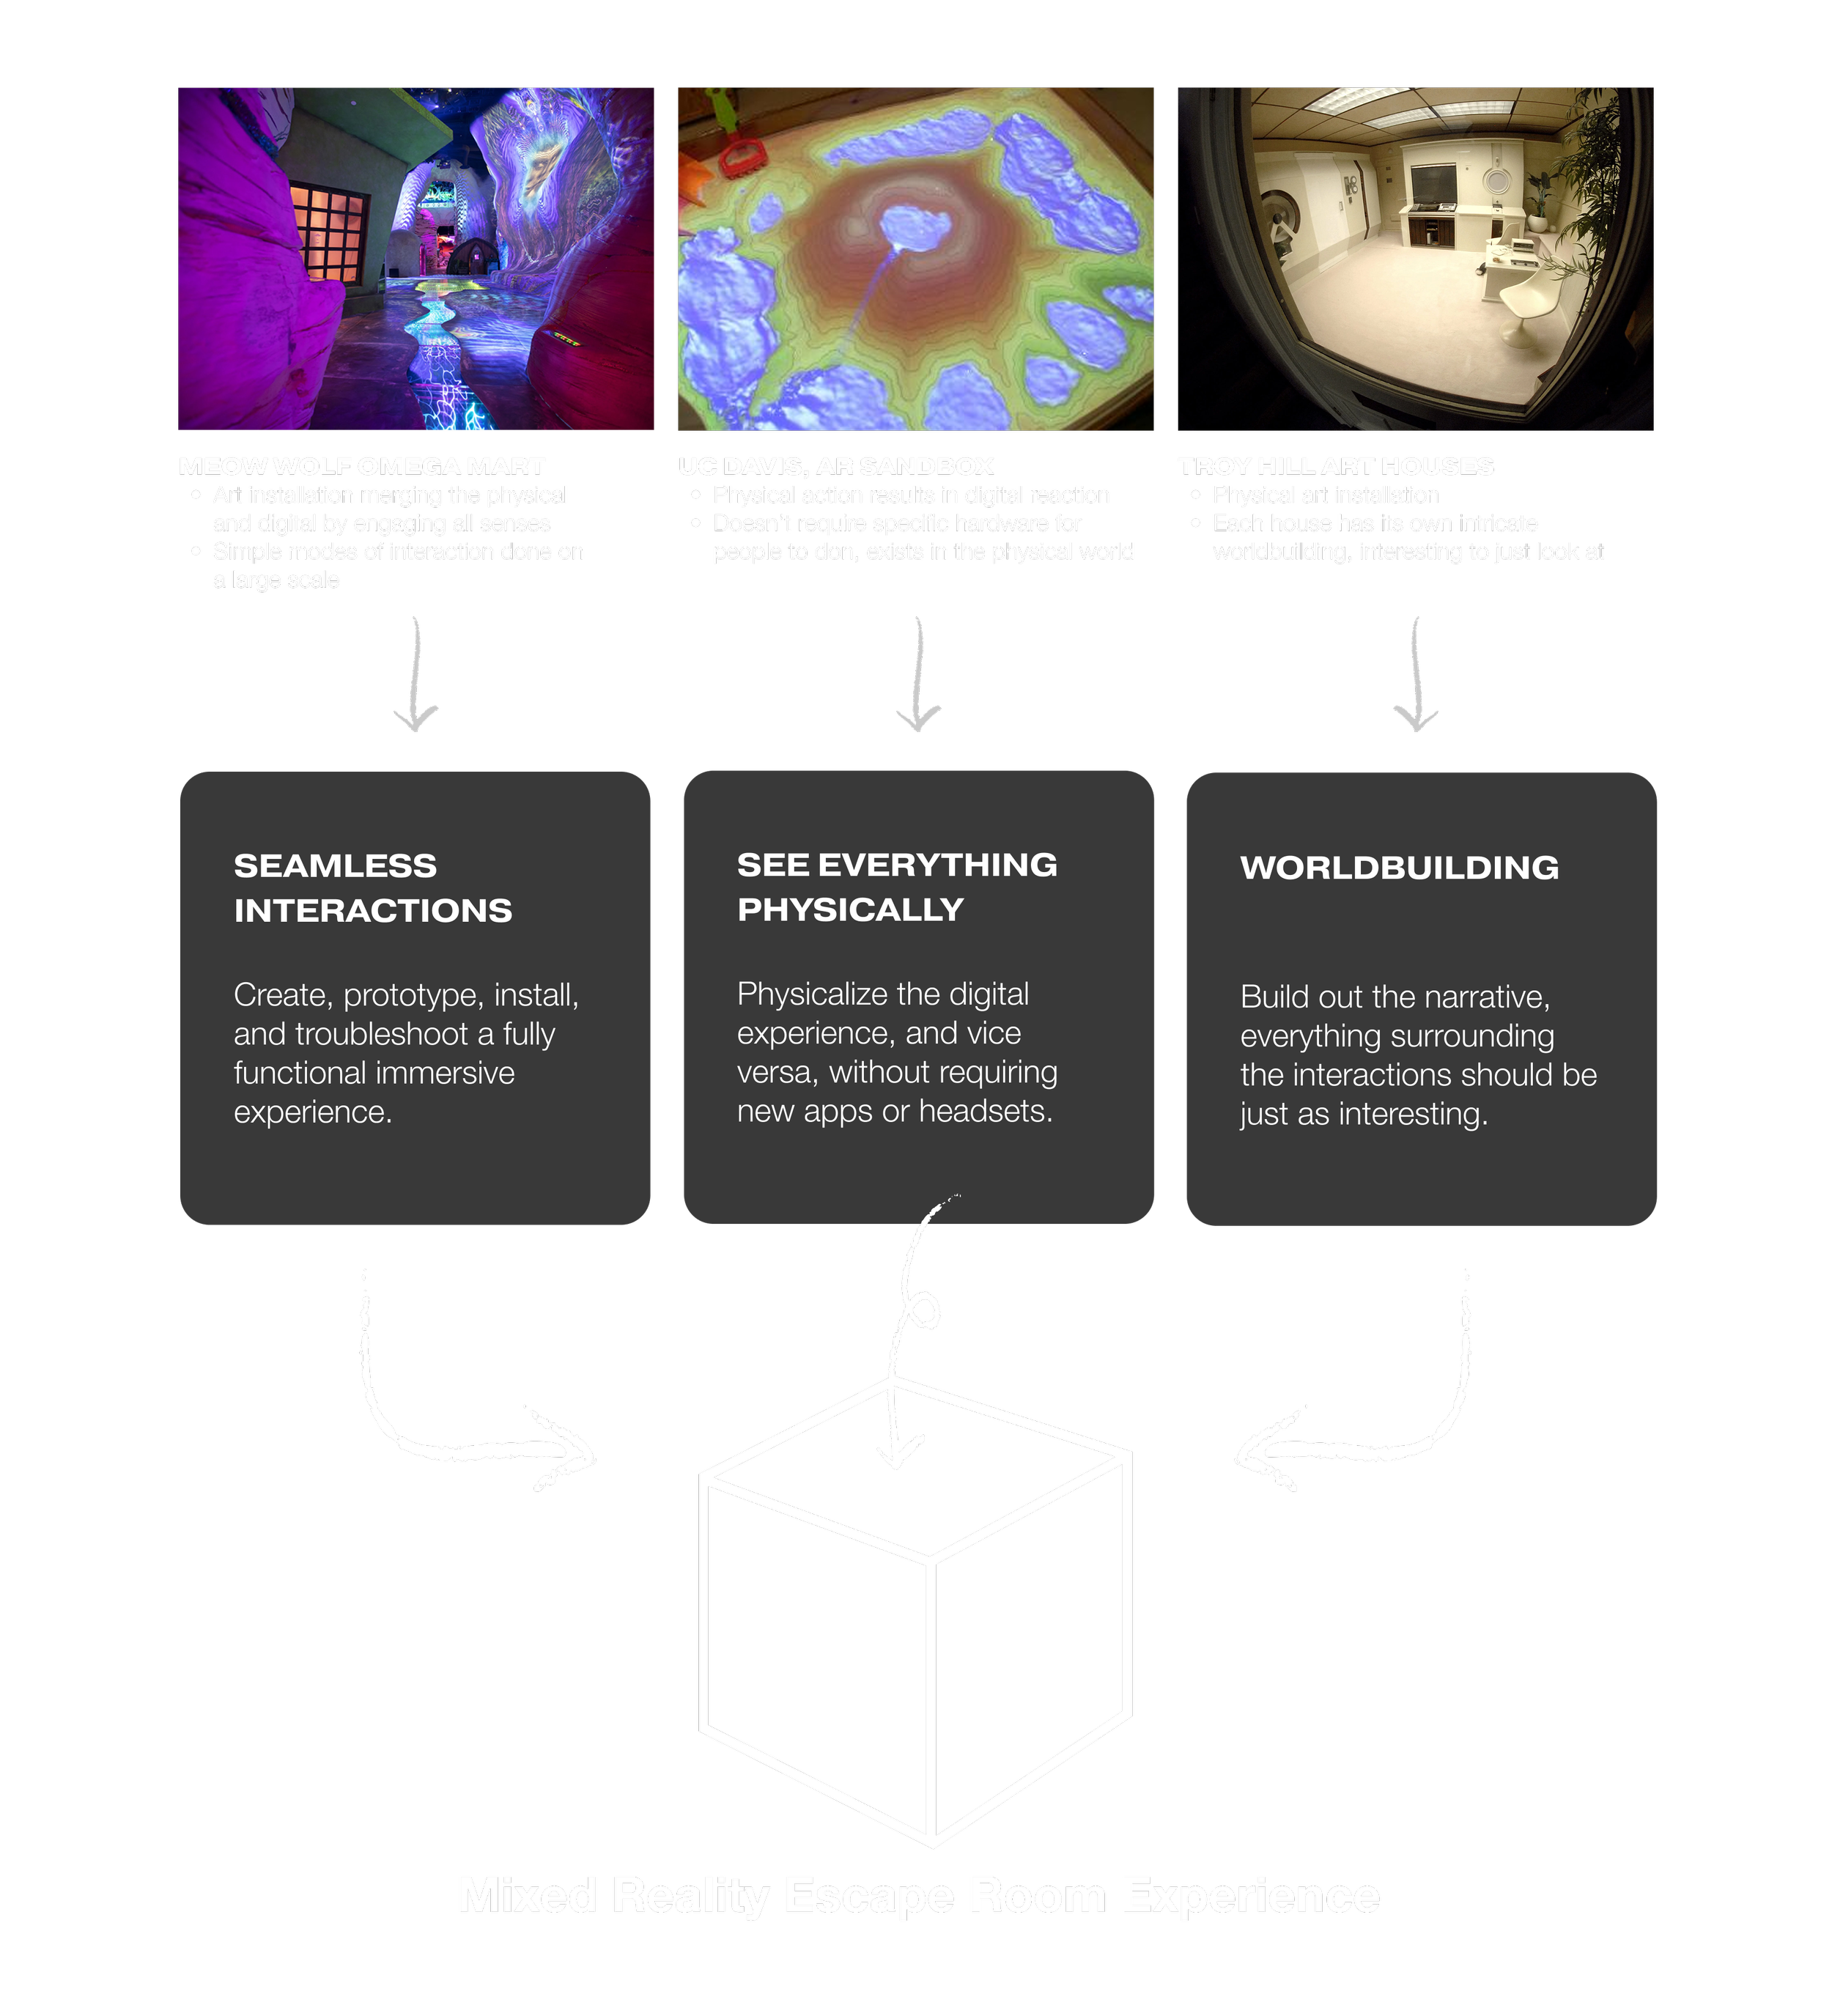
Project Goal
Playable and Novel Experience
Unboxed, or the initial form of the idea, came as an experiential marketing concept I pitched for another class. I reached out to Juhi and the project evolved from there. For Juhi and I, Unboxed is a culmination of our four years at Carnegie Mellon University School of Design. After spending years conceptualizing experiences, we decided we wanted our final project at CMU to be one bringing it to life.
My Role
Blending Narration and Graphics
The difference between this project and our previous ones is not just we needed it to work well, we needed it to work well consistently. This project was a constant back and forth between me and Juhi to balance between the physical and digital needs of the experience. Additionally, escape rooms are amplified by the ambiance of the room. In order to develop the ambiance, we had to define a strong narrative arc Overall, this project in equal parts taught me how to create a cohesive visual for a constrained space, and how to overcome the unexpected challenges that pop-up.
Inspiration
Finding a fun outlet for technical exploration
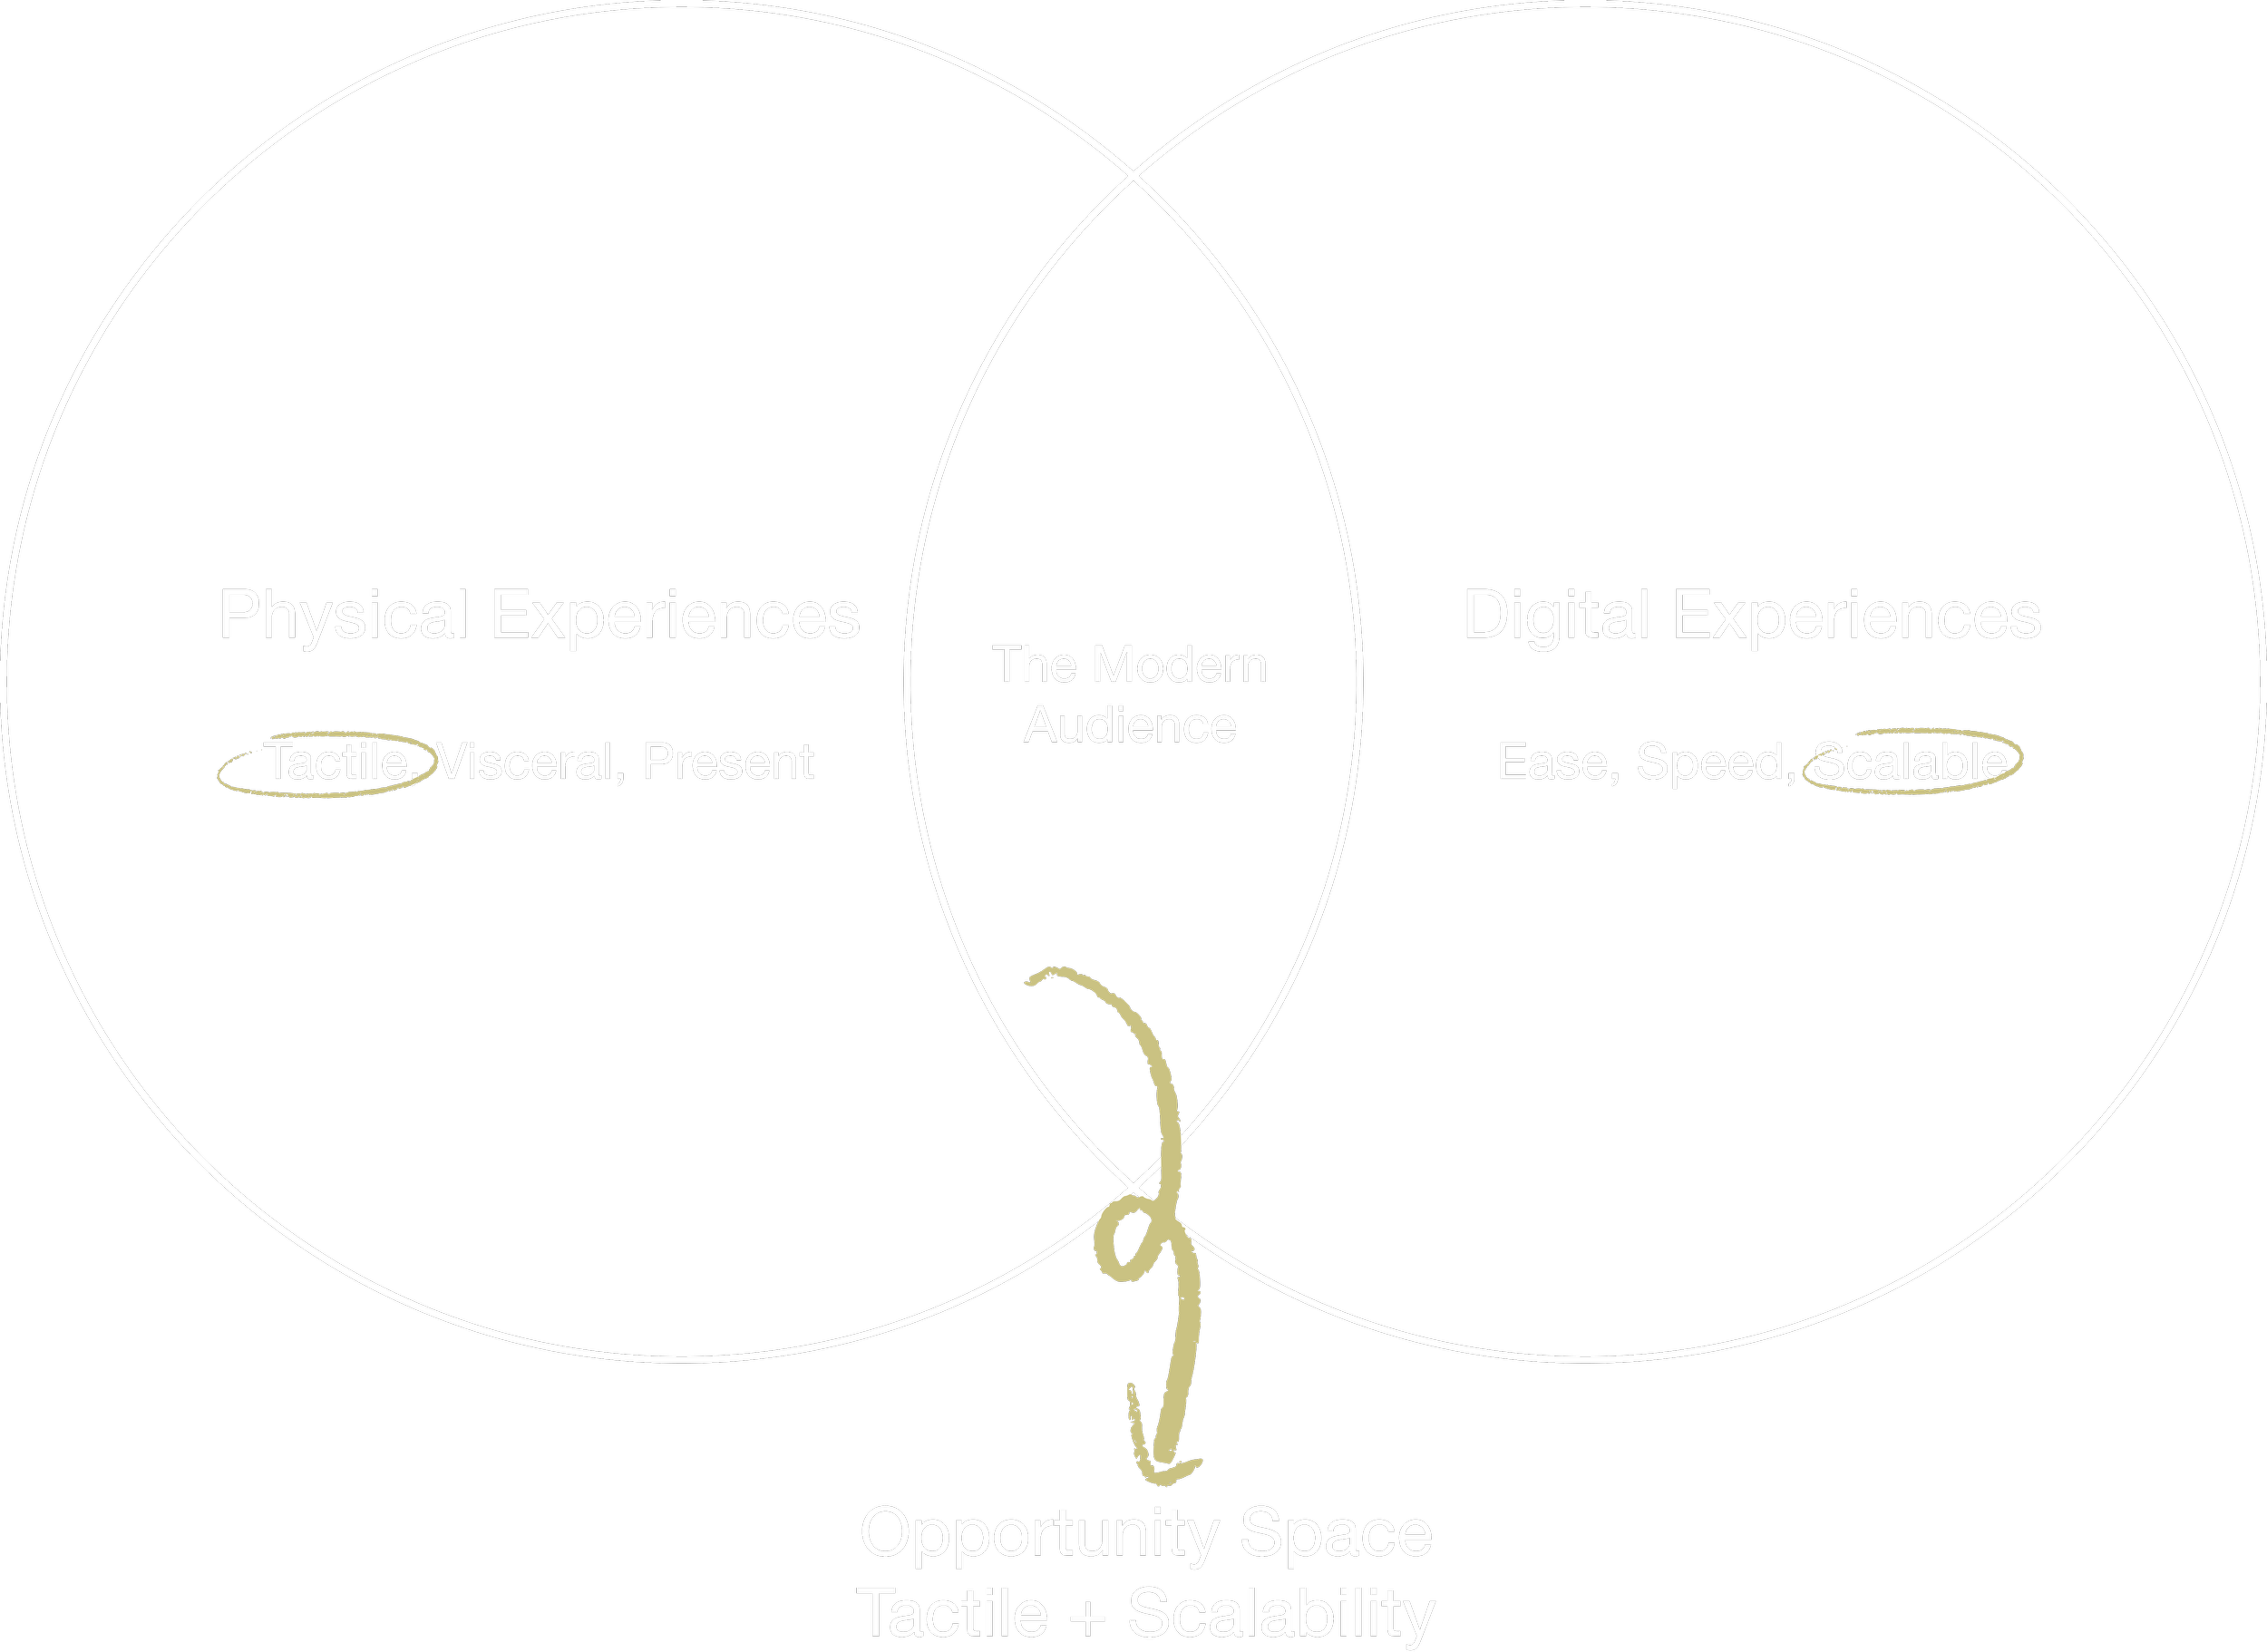
Digital entrenchment is our current reality, but the human desire for the tangible remains irreplaceable. This project bridges that gap, exploring a future where digital and physical experiences are seamlessly connected into something visceral and new.
Overview
Combining delightful physical interactions with digital scalability
The physical world is more engaging, but is slow to build. The digital world is quicker to scale, but less visceral. We balanced between the two while blurring the boundaries between to create hybrid experiences.


Our Motto
This project questions the boundaries of the physical world, but maintains a belief in the irreplaceable delight physical interactions bring to people. The digital world cannot replace the physical, and vice versa.

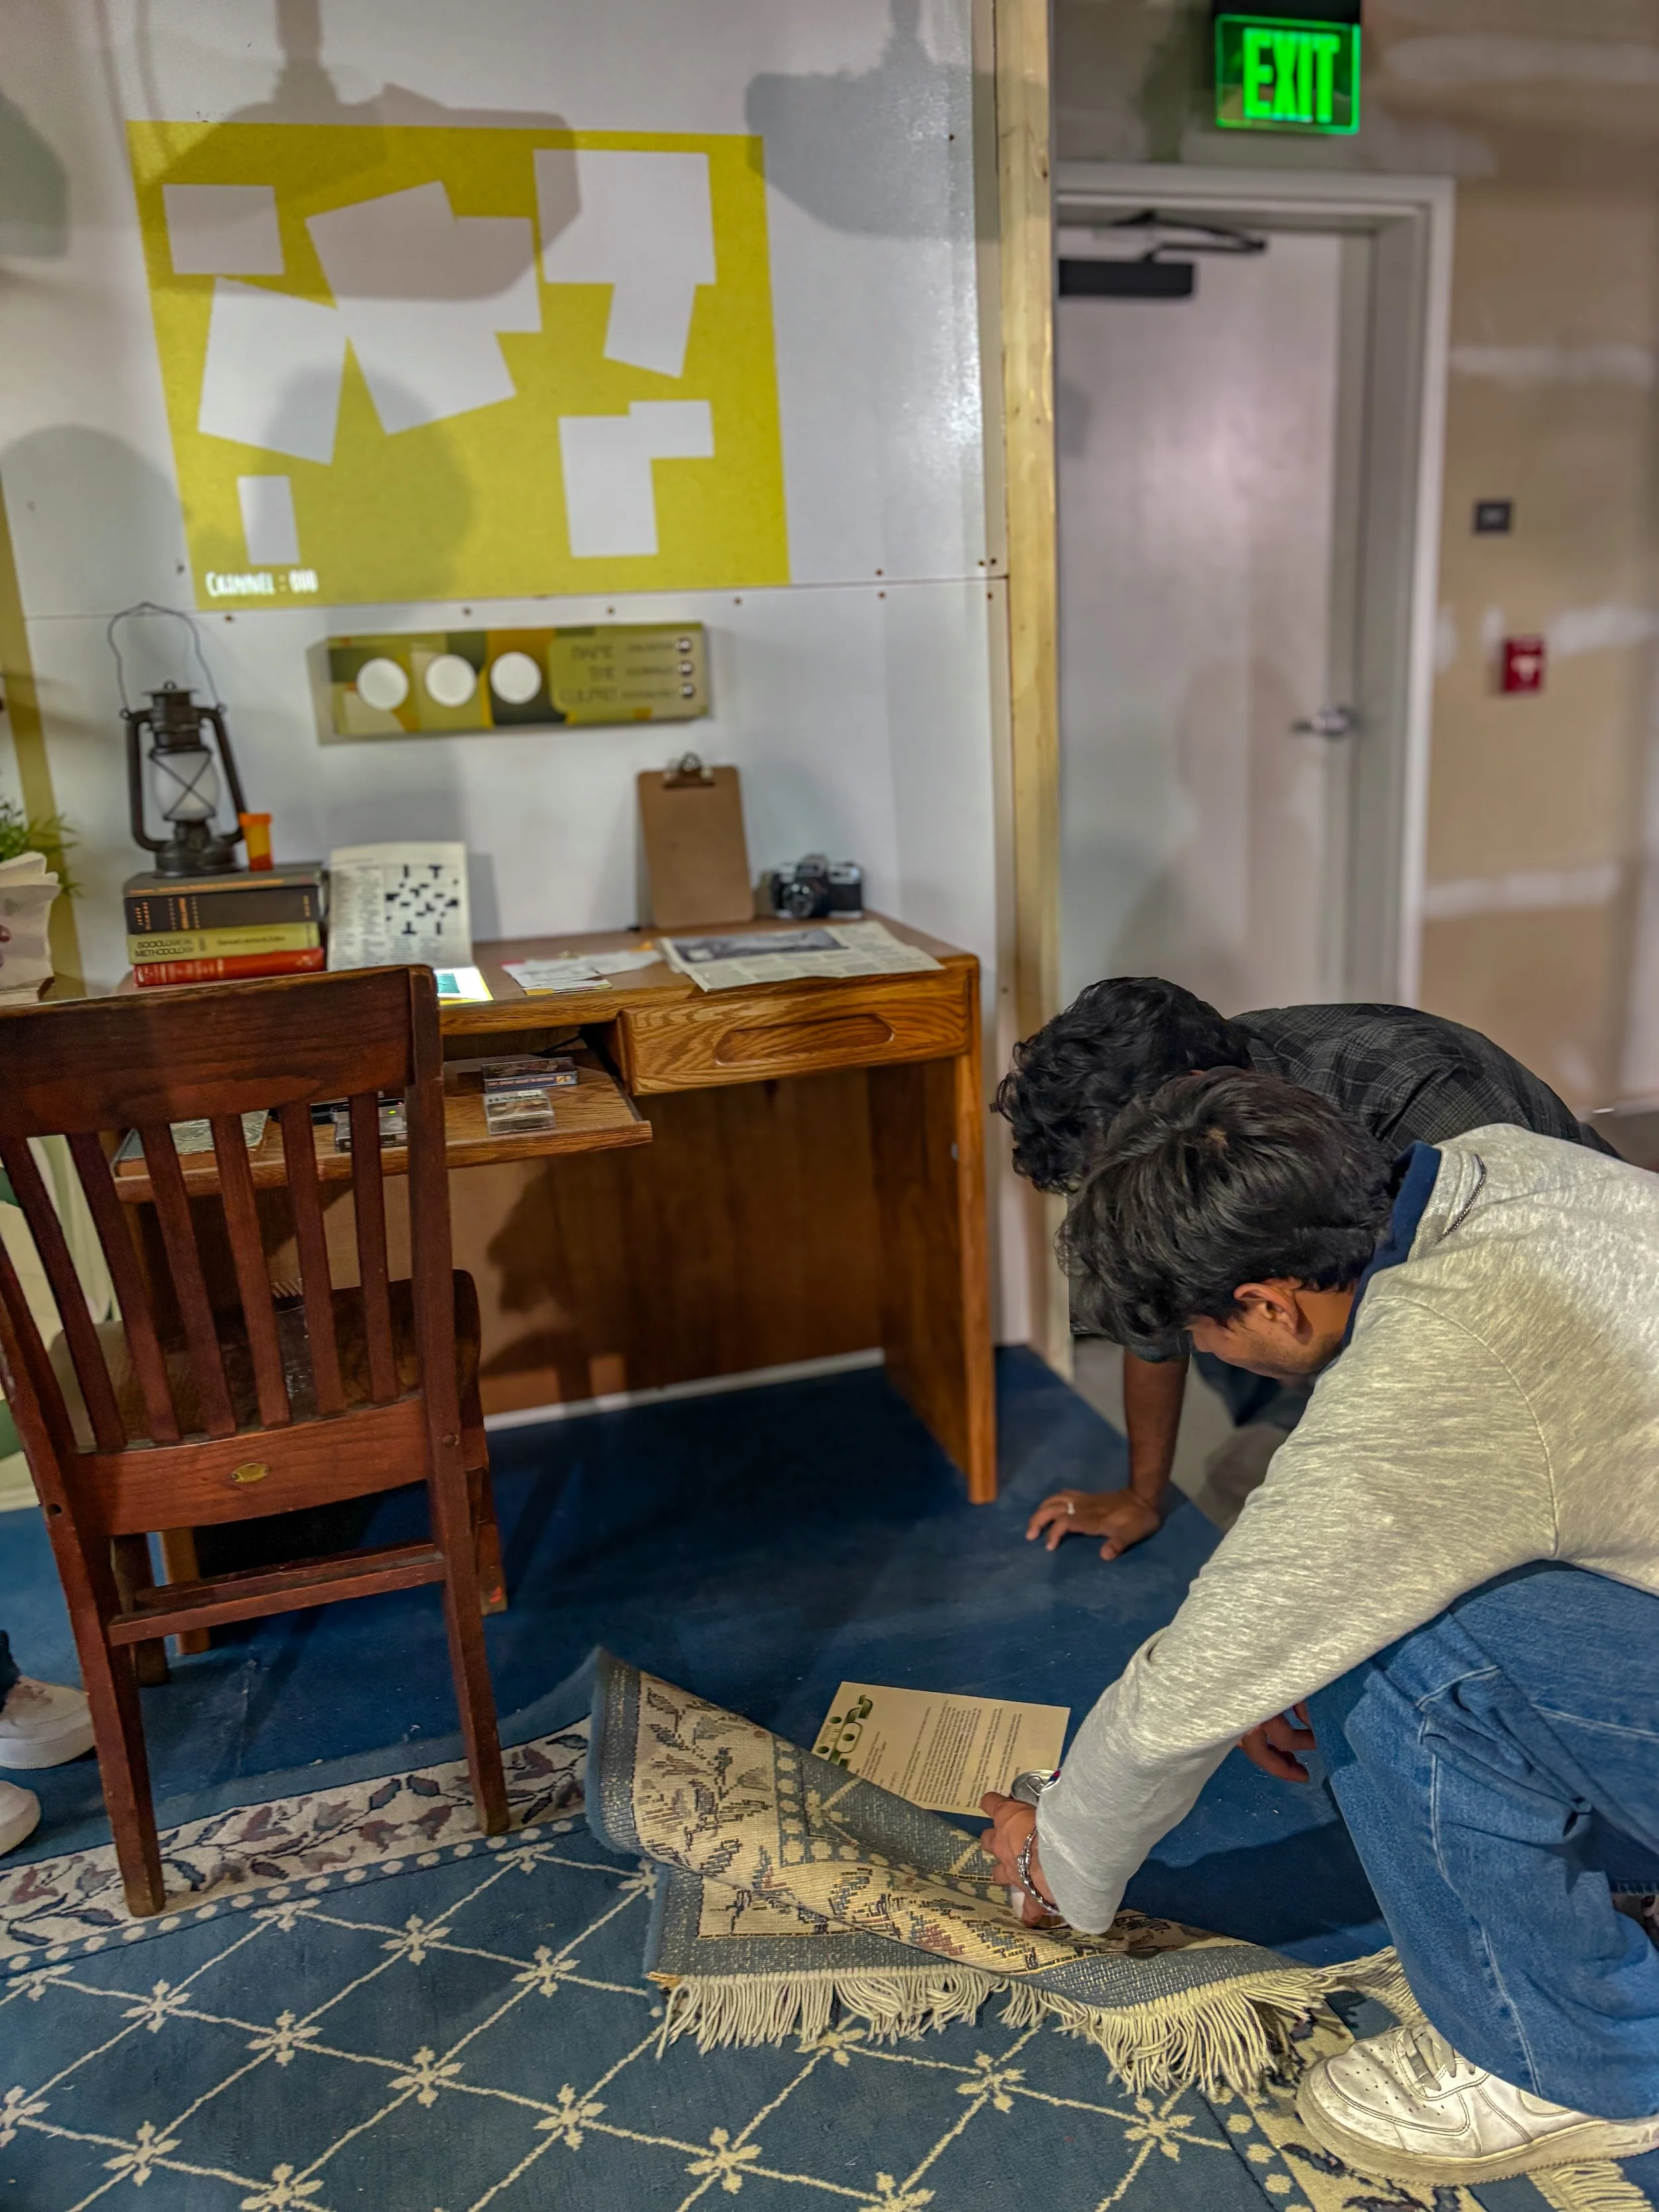
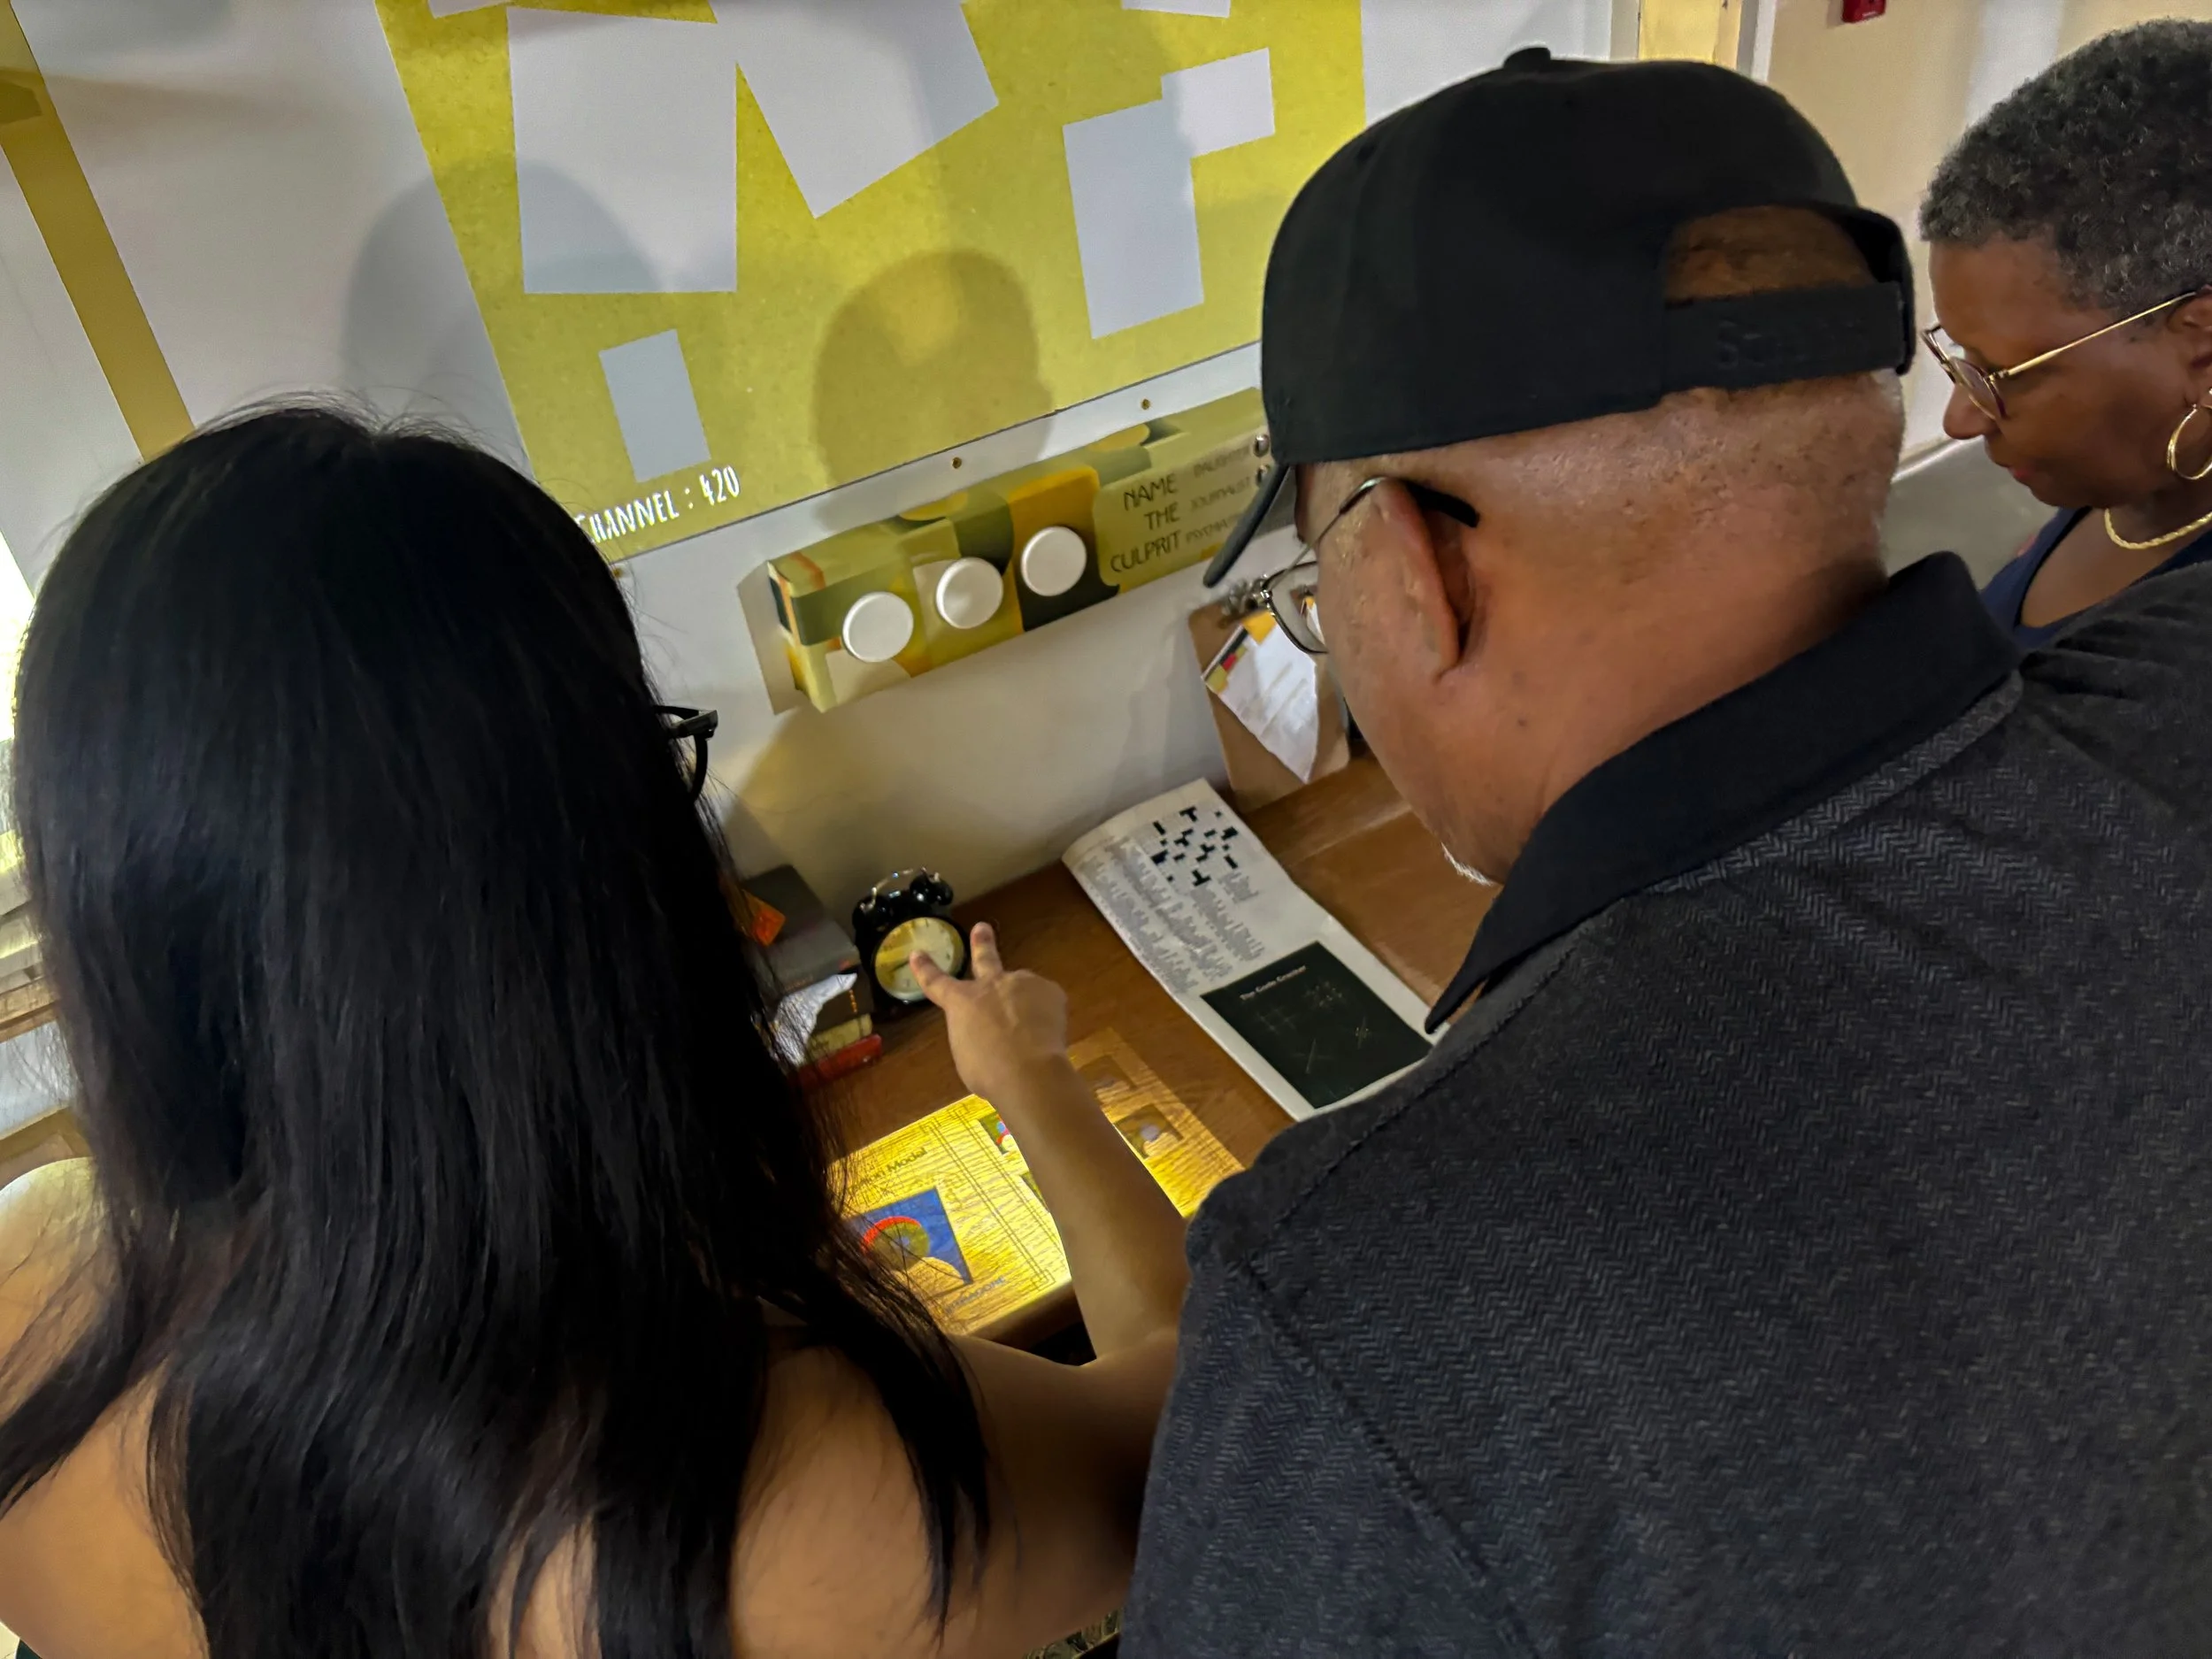
Worldbuilding
Beyond creating those “aha” moments for people, we wanted this space to be filled with little things to make it a more believable world. This encouraged people to look closer, and beyond, for the next clue.
Final Reflections
Sometimes, what sounds like the simplest task is the hardest
I define the hardest task as the task with the largest leap of faith, where even we didn’t know if it would succeed after all the work had been done. As for building the interactions, it was difficult but I was sure we could figure it out eventually. While building the storyline and clue structure comes a close second, but the hardest task was lofting a projector 6 feet above people’s heads. We were doing this on a student’s budget, with limited building experience, and a “universal” projector mount that wasn’t as universal as any of us hoped.
Not everyone needs to “get it,” not everyone should
That may sound bad, especially to me with part of my background being in UX, but evaluating puzzles is a different ordeal. Because some friction leads to a more satisfying “aha!” moment. Rather than focusing on whether people can solve the puzzle, I learned we had to focus more on creating avenues of feedback so that people can recognize when they’re wrong.
The squeaky wheel gets the grease
So much of this project came together while talking to a friend, who knew another friend, who could help us get materials or consultations. This project would not have been possible with all the friends, professors, acquaintances we met over the last four years.
The small details matter
We specifically designed small details in the space to help further flesh out the world, but soon decorative books, pills, and music records were also investigated with equal intensity. If we had the time, it would have been fun to fully design everything in this space.
To the considerate feedback
To Peter, for always listening (and sometimes testing) our escape room, I really appreciate how you always took the time to check-in and listen to our progress. You gave feedback that had us considering new avenues to look into, and I also just really appreciate the support you gave us.
To everyone that helped
This project was a collaboration of everything we’ve learned and everyone we’ve met over the past four years. Everything from sourcing props for our escape room, to play testing interactions, to finding arduinos around campus, so many people have officially and unofficially pitched in. When I first started this project I did so because I thought it would only be possible while I have the physical resources at Carnegie Mellon, but now I recognize it was really the human resources that made this project possible. Thank you for making our dreams come true, and I genuinely wish you all the luck in the future.
Acknowledgements
For the greatest partner
Juhi, who touched TouchDesigner for the first time because of this project. You were able to navigate the technology of this project with an energy and ingenuity that I envy. You made our ideas come to life, and I’m glad you were the one to go through the many trials of this project with me. I wish you best of luck in all your future endeavors, and I look forward to experiencing what you create.
The digital cannot replace the physical, and vice versa
There’s nothing that beats the delight of turning a knob and seeing something change, and there’s something to the novelty of digital/hybrid interactions that just lights people’s faces up. I hope to continue creating experiences in the future that brings together the best of both worlds.
To the invaluable support
A huge, huge, thank you to Dylan for helping us with buying more wood from Home Depot, teaching us how to work the screw driver, and just helping us get the materials we needed to make this project possible. Your assurance that everything is possible (and it was) was what we needed to hear and feel at the time.